UI Overview
This document provides a detailed overview of the User Interface (UI) for the application, describing its main components, navigation, and functionalities.
Navigation Bar
The navigation bar, located at the top of the UI, provides access to essential file operations, exporting options, theme settings, and help resources.
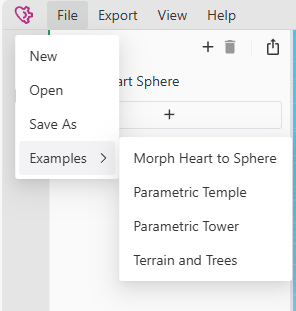
File Menu
The File menu allows you to:
- Create new projects from scratch.
- Load a previously saved project, and save your current project.
- Load examples to quickly explore templates and demos.
TIP
Your current project is always automatically saved, so you never have to worry about losing data.
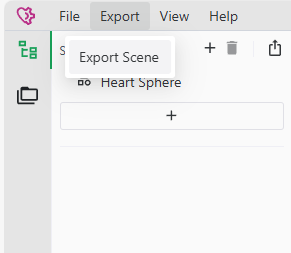
Export Menu
The Export menu provides options to:
- Export your scene or models to common 3D file formats (
.gltfand.obj). - For more details about the exporting process and options, refer to the Exporter Documentation.
Dark Mode Toggle
- The UI includes a Dark Mode toggle for better visibility in low-light environments.
- By default, it follows your system theme.
- The application remembers your last selected theme across sessions.

Help Menu
The Help menu provides quick access to:
- The documentation you are currently reading.
- The current application version.
- A link to the GitHub repository where you can report bugs or request features.

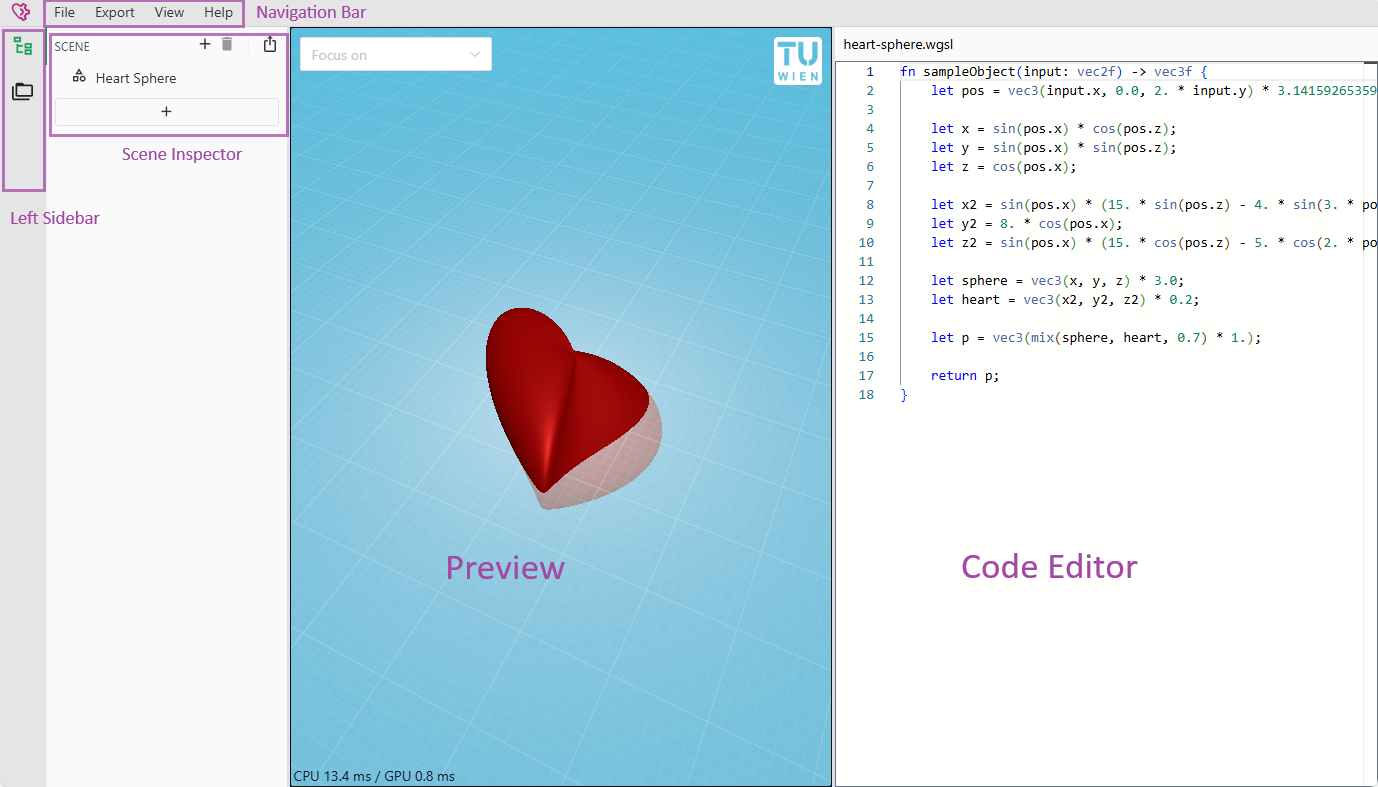
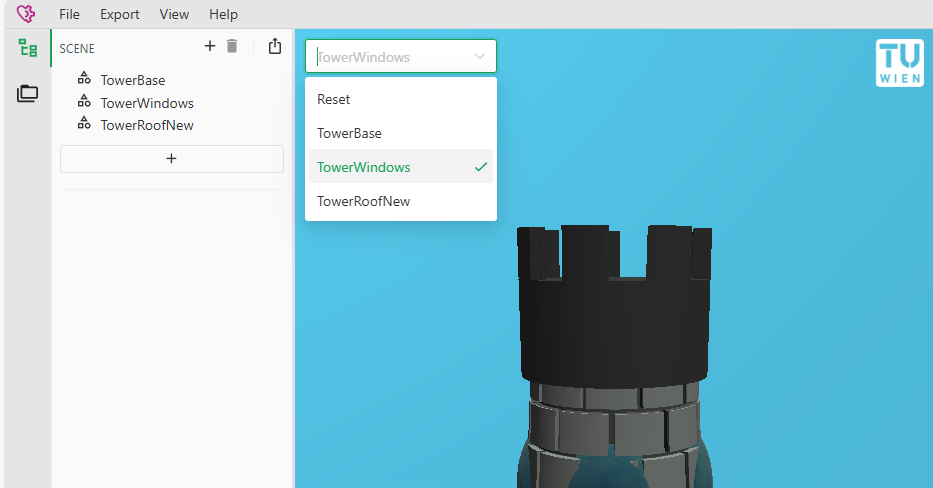
Left Sidebar
The left sidebar has two primary panels: the Scene Inspector and the File Browser.
You will mostly use the Scene Inspector. The File Browser is for lower level control, such as manually editing the scene.json.
Scene Inspector
The Scene Inspector allows you to manage and manipulate the objects in your scene:
- View all objects in the scene.
- Add new objects with the plus (+) button.
- Delete existing objects with the trash bin (🗑️)
- Select multiple objects for simultaneous editing:
- Use Ctrl for individual multiple selection.
- Use Shift for range selection (similar to most desktop applications).
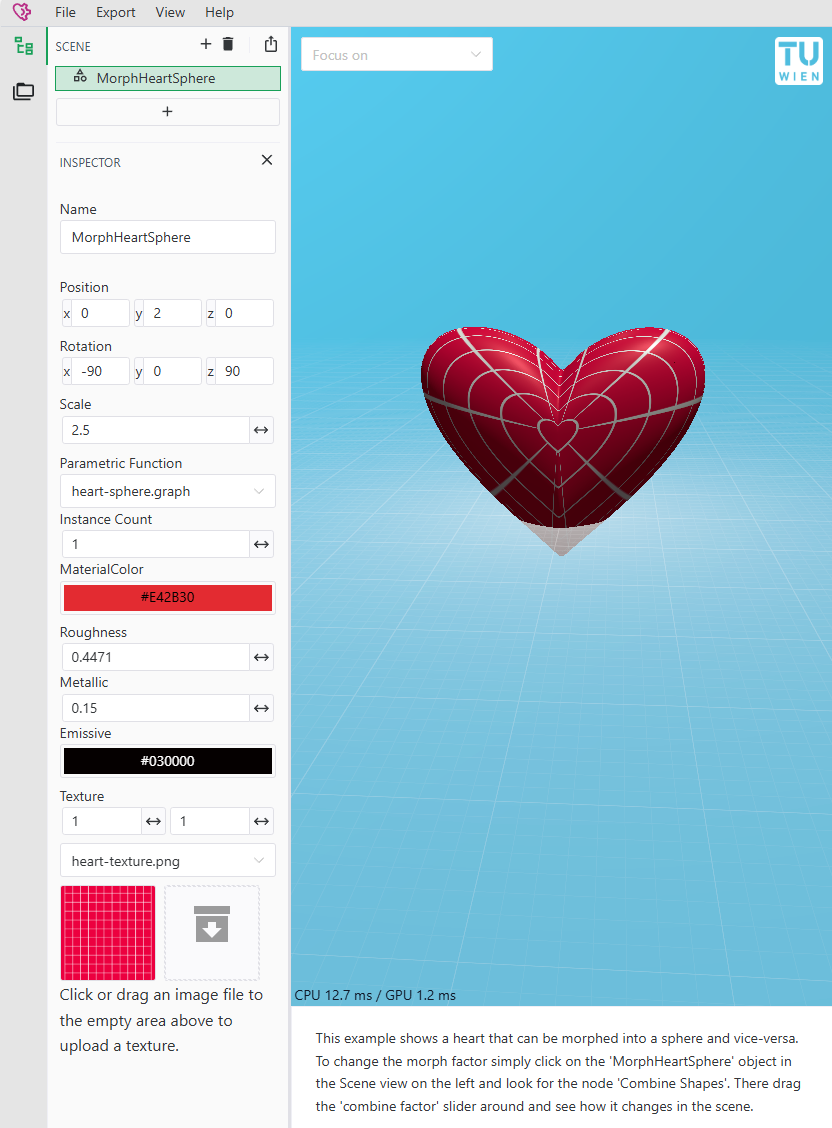
Editing Objects
Once an object is selected, you can modify its properties:
- Position: Move the object within the 3D space.
- Rotation: Rotate the object along different axes.
- Scale: Resize the object proportionally.
- Parametric Function: Choose the function that defines the object's geometry.
- Instance Count: Define how many instances (copies) of the object appear in the scene. The parametric function can use the instance count to draw each instance slightly differently!
- Material (PBR - Physically Based Rendering):
- Roughness: Adjust the surface texture from coarse to shiny.
- Metallic: Set how metallic the object appears.
- Emissive: Make the object emit light, affecting the scene lighting.
- Texture Settings:
- Size: Set the scaling of the texture. The texture automatically repeats.
- Texture Selection: Upload and apply textures from your local filesystem. We take your privacy seriously; uploaded textures are never sent to any server.
File Browser
The file browser shows you the current state of all files in your project.
The main file is the scene.json file, which defines the structure and content of your scene.
For each parametric function, there is
- A
.wgslfile which contains the shader code. If it is a graph-based function, then this file is read-only. - Optionally a
.graphfile which contains the shader graph.
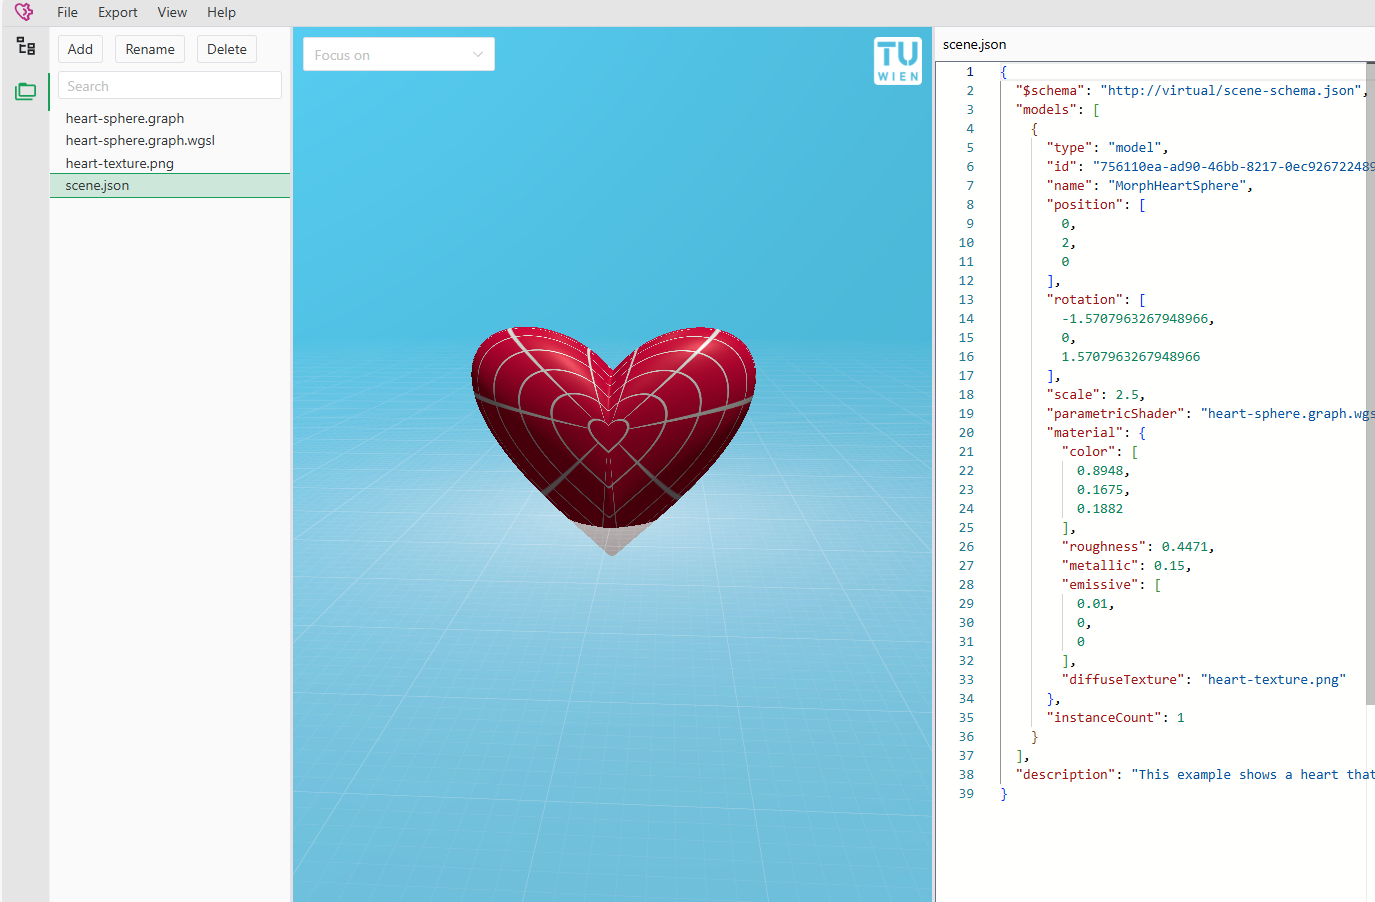
- You can directly edit the
scene.jsonfile within the application. - Real-time updating: Changes to the files are reflected instantly in the scene.
- Autocomplete in the
scene.jsonis available based on a JSON Schema to assist and validate your edits.
Output View
The Output View displays the final generated 3D model based on your scene.
- Rendering Engine: Uses an advanced, research-based renderer described in this paper.
- Technology: Powered by the modern WebGPU API, ensuring high performance and future-proof rendering.
- Browser Support: Chrome and Edge are fully supported. Firefox support is expected later this year, pending feature updates.
Features:
- Top-left corner: Focus on a selected object to center and zoom in.
- Bottom-left corner: Real-time FPS counter.
Code/Graph View
Located on the right side of the interface, the Code/Graph View provides two alternative methods for creating and editing shapes:
- Edit the Code: Directly modify the parametric or procedural code that defines the shape behavior and appearance.
- Edit the Graph: Use a visual graph-based editor to build complex shapes without writing code manually.
These two modes cater to the different workflows of both coders and designers.