Programmatic Shapes
Math2Model allows you to write WGSL shaders to create 3D models.
We recommend familarizing yourself with the WGSL shader syntax before continuing. Tutorials that we recommend are
Defining a shape
Our shaders have an entry point fn sampleObject(input2: vec2f) -> vec3f. This function gets evaluated repeatedly to get all the 3D coordinates for the mesh. The input parameters are two-dimensional, both in the range from 0 to 1, and can be thought to span the unit square (from 0 to 1 in both directions).
For example, a plane in 3D can be defined as
fn sampleObject(input2: vec2f) -> vec3f {
    let x = input2.x;
    let y = input2.y;
    let z = 0.;

    return vec3f(x, y, z);
}
Objects can be resized by multiplying their coordinates
fn sampleObject(input2: vec2f) -> vec3f {
    let x = input2.x * 10.0;
    let y = input2.y * 10.0;
    let z = 0. * 10.0;

    return vec3f(x, y, z);
}
Or flipped, by swapping coordinates!
fn sampleObject(input2: vec2f) -> vec3f {
let x = input2.x * 10.0;
let y = 1. * 10.0; // Elevation
let z = input2.y * 10.0;
return vec3f(x, y, z);
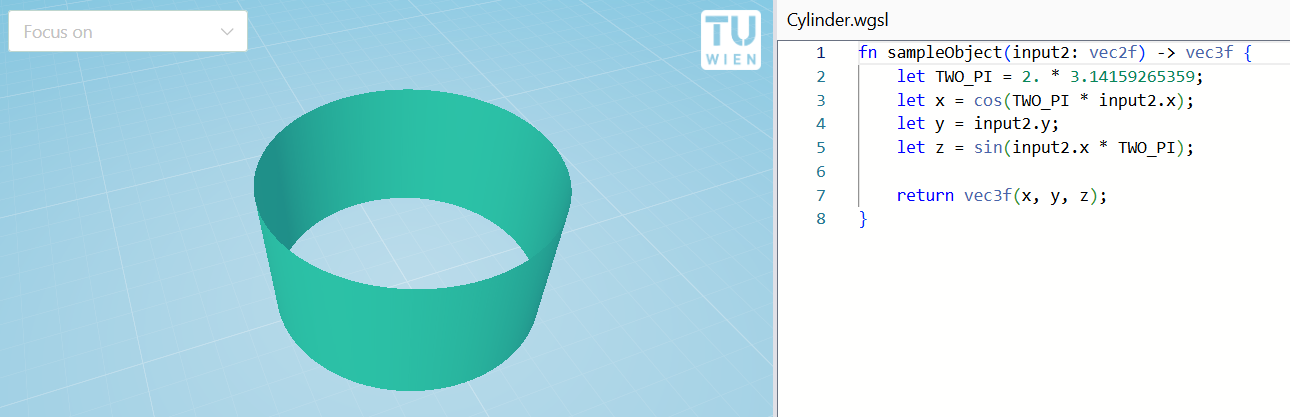
}An open cylinder can be created by bending a plane. It can be defined as follows:
fn sampleObject(input2: vec2f) -> vec3f {
    let TWO_PI = 2. * 3.14159265359;
    let x = cos(TWO_PI * input2.x);
    let y = input2.y;
    let z = sin(input2.x * TWO_PI);

    return vec3f(x, y, z);
}
The result looks like this:
Globals
Time
time.elapsed(f32) - number of seconds since program starttime.delta(f32) - number of seconds that the last frame tooktime.frame(u32) - frame index
Example: Waving plane
fn sampleObject(input2: vec2f) -> vec3f {
    let wave = sin(input2.x * 7. + time.elapsed);

    let x = input2.x * 10.0;
    let y = wave * 2.0; // Wave scale
    let z = input2.y * 10.0;

	return vec3f(x, y, z);
}
Screen
screen.resolution(vec2<u32>) - size of the screen in pixelsscreen.inv_resolution(vec2f) - convenience accessor for1./screen.resolution
Mouse
mouse.pos(vec2f) - current position of the mouse on the screenmouse.buttons(u32) - 1 if a mouse button is held, 0 otherwise
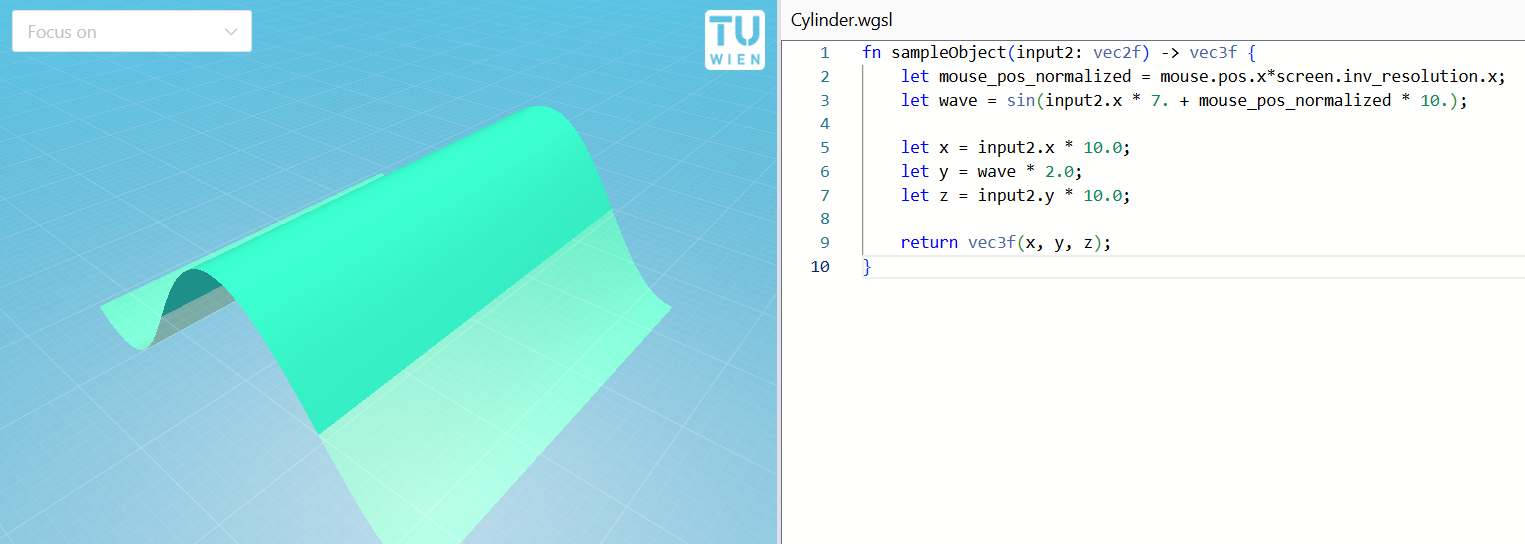
Example: Animating the wave when the mouse is moved across the screen
fn sampleObject(input2: vec2f) -> vec3f {
    let mouse_pos_normalized = mouse.pos.x*screen.inv_resolution.x;
    let wave = sin(input2.x * 7. + mouse_pos_normalized * 10.);

    let x = input2.x * 10.0;
    let y = wave * 2.0;
    let z = input2.y * 10.0;

    return vec3f(x, y, z);
}
Coloring a shape
Shapes can be colored. The UI exposes typical material settings of a physically-based shader and allows for applying textures. See UI tutorial for more.
It is also possible to write a shader function to color in a shape. To do so, simply add a function with the signature fn getColor(input: vec2f) -> vec3f to your shader.
WARNING
The signature must match exactly. This includes the name of the input parameter. This is due to a technical limitation in our implementation. To address this, and other rough edges, we started the WESL project.
The coloring function will then be used as the "color" input into a PBR (physically based rendering) material. It will be combined with the roughness, metallic and emissive values.
To output a single, fixed color, one simply returns that color. Do note that it follows the floating point RGB convention, where the color values are in the 0-1 range.
fn getColor(input: vec2f) -> vec3f {
  return vec3f(1.0, 0.0, 0.0);
}
To get more interesting patterns, one uses the input coordinates. These are the same input coordinates that the sampleObject function receives. Here, we are using the sin function to get repeating stripes. The sin function repeatedly goes to high values (light) and then to low values (dark).
fn getColor(input: vec2f) -> vec3f {
    let stripes_x = sin(input.x * 100.0);
    let thin_stripes_x = smoothstep(0.6, 1.0, stripes_x);
    return vec3f(thin_stripes_x);
}
Such stripes can be combined to create grids.
fn getColor(input: vec2f) -> vec3f {
let stripes_x = sin(input.x * 100.0);
let thin_stripes_x = smoothstep(0.6, 1.0, stripes_x);
let stripes_y = sin(input.y * 100.0);
let thin_stripes_y = smoothstep(0.6, 1.0, stripes_y);
return vec3f(max(thin_stripes_x, thin_stripes_y));
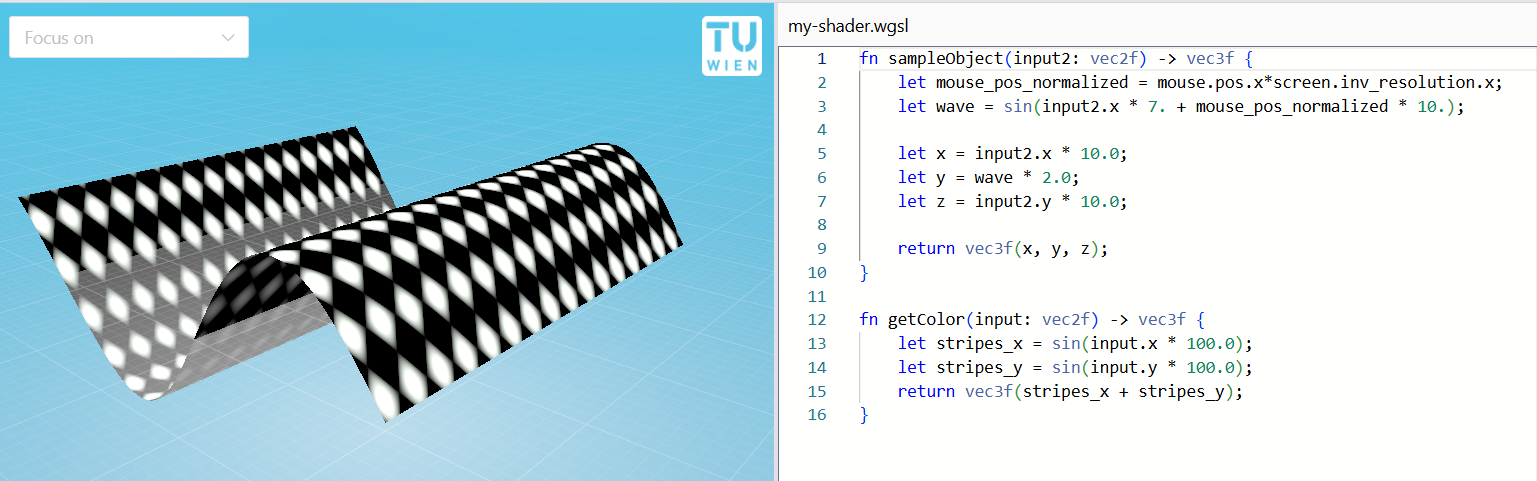
}Or one can be creative, and even create a rotated checkerboard pattern!
fn getColor(input: vec2f) -> vec3f {
    let stripes_x = sin(input.x * 100.0);
    let stripes_y = sin(input.y * 100.0);
    return vec3f(stripes_x + stripes_y);
}
Globals for coloring
When writing custom coloring routines, it is rare to use any of the built-in globals. The most common ones can be seen below in the "default coloring function".
For completeness, all usable globals are as follows
material.color_roughness(vec4f) - the .xyz components are the color, the 4th component is the automatically applied PBR roughness valuematerial.emissive_metallic(vec4f) - the .xyz components are the automatically applied emissive color, the 4th component is the automatically applied PBR metallic valuematerial.has_texture(u32) - 1 if there is a texture, otherwise 0material.texture_scale(vec2f) - user supplied scaling of the texturet_diffuse(texture2d<f32>) - user supplied texturelinear_sampler(sampler) - a linear sampler that wraps around
Default coloring function
The default function for coloring in a shape applies a texture if one is present. Otherwise it falls back to the color.
fn getColor(input: vec2f) -> vec3f {
  if material.has_texture != 0u {
    return textureSample(t_diffuse, linear_sampler, input * material.texture_scale).rgb;
  } else {
    return material.color_roughness.rgb;
  }
}